
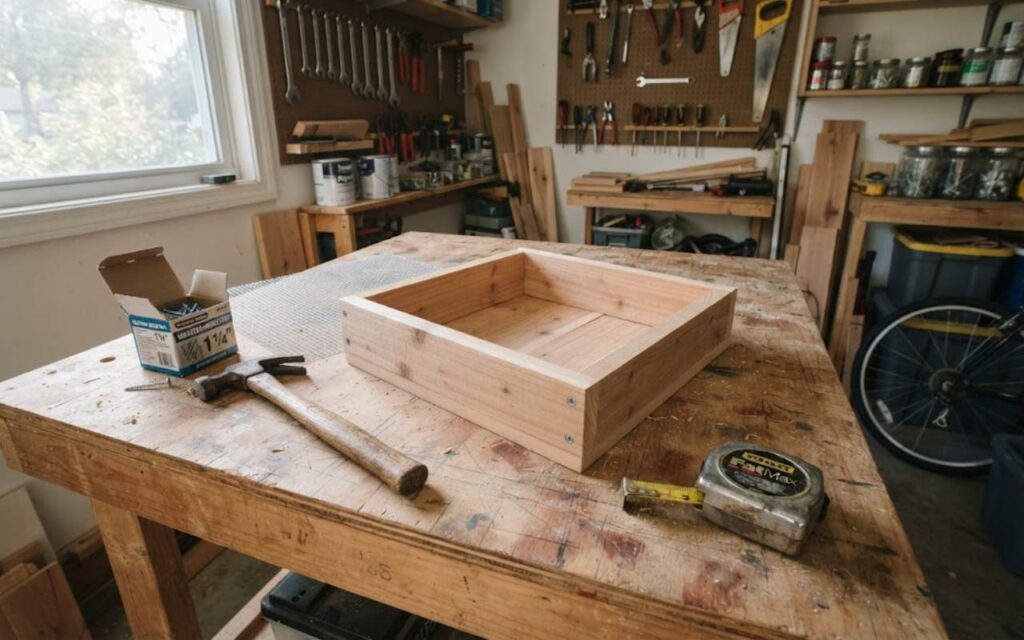
Finding the easiest way to build a wooden platform feeder from scratch comes down to ditching complicated joinery in favor of a simple, open frame with a breathable floor. Most commercial box feeders fail because solid wood bottoms trap moisture and spoil seed.
Learning how to build an easy wooden platform bird feeder from scratch with untreated, rot-resistant lumber solves this issue, utilizing basic butt joints and proper screen drainage to assemble a long-lasting tray feeder in less than an hour.
Quick-Glance Field Summary
Building a platform feeder requires an open wooden frame fitted with an elevated wire mesh bottom to ensure rapid drainage and seed aeration. This setup prevents deadly mold outbreaks while supporting both ground-feeding species and larger perching birds.
- Frame material: 1×2 or 1×3 inch untreated Western red cedar or cypress boards
- Outer dimensions: 12 inches wide by 16 inches long for balanced perching space
- Floor screen: 0.25-inch galvanized steel hardware cloth to block chewing rodents
- Fasteners: 1.25-inch exterior coated wood screws and heavy duty staples
- Hanging gear: Four zinc-plated steel screw eyes with weather-rated nylon cord
- Collision safety rule: Mount within 3 feet of glass or further than 30 feet away
Picking the Right Wood and Avoiding Toxic Lumber
Choosing the right lumber directly influences how long your feeder lasts and protects visiting wildlife from harmful chemicals. You should completely avoid pressure-treated green wood because chemical preservatives, such as copper azole, can leach directly into wet seed.
Untreated Western red cedar, cypress, or redwood offer natural resistance to wood-boring insects and rot without introducing toxic compounds to your yard.
Plain white pine is a cheap alternative if cedar is not available at your local lumber yard. Pine will decay faster in damp conditions, but leaving the wood unfinished or applying a light coat of pure raw linseed oil can extend its outdoor lifespan.
Avoid conventional chemical wood stains, exterior polyurethanes, or paints that produce volatile organic fumes near feeding birds.
Here are the core lumber materials ranked by outdoor durability:
- Western red cedar: Highest natural resistance to rot and moisture swelling
- Cypress: Excellent weather tolerance with minimal warping in humid climates
- Untreated white pine: Budget-friendly and easy to cut, though prone to weathering over two seasons
- Poplar or scrap plywood: Poor choices that delaminate quickly when exposed to rain
| Feeder Build Component | Standard Dimensional Cutting Spec | Avian Safety & Durability Feature | Mandatory Shop Assembly Rule |
|---|---|---|---|
| Outer Retention Frame | Four pieces cut from rough 1×2 cedar; finalized to create a square 12″ x 12″ inner boundary lane. | Untreated wood protects birds from ingesting chemical treatment stains. Prevents seed spill over. | Pre-drill all pilot screw holes to avoid splitting the cedar grain; join corners securely using exterior weather-coated wood screws. |
| Removable Drainage Floor | Sized to 11.5″ x 11.5″ using an 1/8-inch wire mesh galvanized or stainless steel screen sheet. | Elite; offers maximum cross-ventilation and instant rain escape to halt seed fermentation. | Staple the screen tightly across a small inner lip frame using heavy-duty galvanized wire tacks; file sharp edges smooth. |
Cutting Your Boards and Sizing the Frame
A standard tray size of 12 by 16 inches provides ample landing room for larger birds like blue jays and northern cardinals without becoming unwieldy. Sizing the feeder frame any larger often results in wasted seed sitting in the tray for too long. If you cut your side walls from standard 1×2 or 1×3 lumber, the nominal two-inch or three-inch wall height effectively stops wind from scattering seed across the lawn.
When buying your wood, remember that standard “1x” lumber has an actual thickness of 0.75 inches. Experienced builders in backyard birding forums point out that simple square butt joints hold up better than mitered 45-degree angles for outdoor feeders.
Miters tend to split open after repeated wet and dry cycles, whereas square butt joints secured with exterior screws hold their shape for years. Pre-drill every screw hole with a small pilot bit to prevent your cedar boards from splitting near the ends.
To build the basic four-sided frame, prepare these core cuts:
- Two long side rails: Cut to exactly 16 inches in length.
- Two short end rails: Cut to exactly 10.5 inches in length.
- Two inner support cleats: Cut to 14.5 inches from 0.75×0.75-inch scrap wood.
By sandwiching the 10.5-inch end rails between the 16-inch side rails, the true 0.75-inch thickness of the wood adds exactly 1.5 inches to the total width. This creates a perfectly square, uniform outer box measuring exactly 12 by 16 inches. Fasten the corners using waterproof wood glue paired with coated exterior deck screws, and wipe away any wet glue squeeze-out with a damp rag before it hardens.
Adding a Screen Bottom to Prevent Wet Rotting Seed
The floor of your platform feeder is the most critical component for wild bird safety. In DIY birding communities on Reddit, builders frequently share photos of ruined feeders where builders used solid plywood bottoms with a few drilled drain holes.
Those drilled holes clog with seed dust almost immediately, creating pooled water that fosters deadly fungal growth.
Using 0.25-inch galvanized hardware cloth allows rain to pass straight through while keeping sunflower seeds and safflower inside the tray. A common mistake discussed on r/backyardbirds is simply stapling the wire mesh to the bottom face of the wood frame.
Over time, the combined weight of heavy seeds and doves pulls the staples loose, dumping your seed onto the ground.
Follow this sequence to secure a long-lasting wire base:
- Cut the 0.25-inch hardware cloth one inch wider than your frame opening using tin snips
- Fold the sharp cut edges inward to create a smooth, double-thick wire border
- Staple the mesh securely to the bottom edges using heavy duty stainless steel staples
- Screw thin wooden battens directly over the stapled wire edge to lock the mesh in place permanently
Hanging Your Platform Feeder and Attracting Birds
To ready your completed platform tray for the backyard, pre-drill four pilot holes at the inner corners of the frame. Twist zinc-plated steel screw eyes into the wood, ensuring they bite deep into the cedar grain.
Tether a length of weather-rated nylon cord or lightweight steel chain to each eye, bringing the strands together at a central heavy-duty carabiner clip to keep the tray perfectly balanced.
Hang the platform in an open area with clear sightlines so visiting birds can easily look out for neighborhood cats. To satisfy ornithological collision safety rules, make sure the installation sits either safely within 3 feet of your living room window glass or well beyond 30 feet away from the house.
Fill the wire mesh floor with high-lipid black oil sunflower seeds, safflower, or raw peanut splits to attract high-metabolism chickadees, nuthatches, and cardinals to your new handmade observation station.