
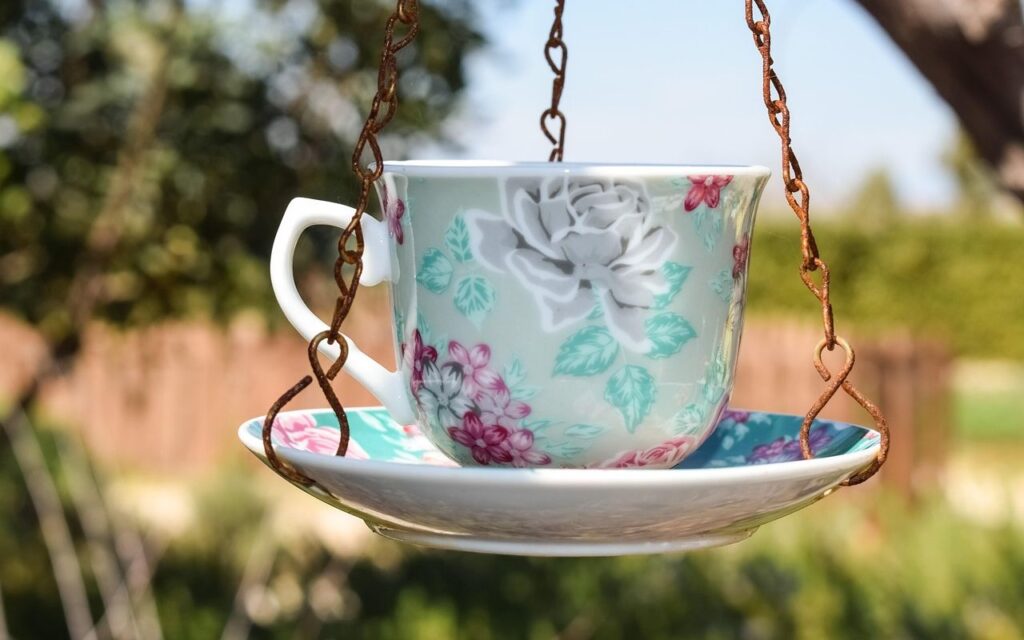
earning how to turn a teacup and saucer into a vintage bird feeder allows backyard naturalists to transform thrift-store porcelain into a practical feeding station for small songbirds. This simple project combines yard decor with functional wildlife support when you discover how to make an easy DIY teacup and saucer bird feeder using weatherproof hardware and safe materials.
Many DIY builds fail quickly outdoors because glazed ceramic surfaces lack traction and trap stagnant moisture, leading to moldy feed and shattered china. Addressing these physical challenges during construction guarantees that your feeder remains safe, sanitary, and durable through changing seasons.
Quick-Glance Field Summary
Building a durable vintage teacup bird feeder requires mechanical drainage holes, weatherproof marine epoxy, and textured perching surfaces to ensure avian safety. By properly anchoring the cup to the saucer and hanging the assembly securely, you prevent seed spoilage and structural failure during extreme weather.
- Drill bit: 1/4-inch diamond-grit ceramic hole saw operated at low RPM with continuous water lubrication
- Bonding agent: Two-part marine epoxy or 100% exterior silicone sealant (never craft hot glue or cyanoacrylate super glue)
- Mounting hardware: Stainless steel threaded rod, rubber washers, zinc-plated nuts, and weather-resistant chain
- Placement zone: Position within 3 feet of exterior windows or beyond 30 feet to prevent fatal avian collisions
- Recommended feed: High-energy black oil sunflower seed or safflower seed to minimize waste accumulation
Choosing the Right Teacup and Glue
To ensure your feeder survives harsh weather, select thick-walled ceramic or vitrified porcelain paired with two-part marine epoxy or exterior-grade silicone rather than standard craft glue. These industrial adhesives maintain bond strength through seasonal freeze-thaw cycles without leaching harmful chemicals.
Many hobbyists make the mistake of using standard hot melt adhesive or fast-drying super glue. In the community forum r/backyardbirds, multiple contributors documented complete structural failures where hot glue turned brittle and dropped full feeders to the flagstones during the first autumn freeze.
Vitrified porcelain expands and contracts with shifting ambient temperatures, which readily breaks weak, brittle glue lines. Look for vintage dishware made from stoneware, ironstone, or heavy earthenware rather than paper-thin bone china. Thicker pieces provide structural heft and resist cracking during the drilling and assembly stages.
- Cup profile: Wide-mouth breakfast cups or shallow tea bowls offer easier interior access for foraging birds.
- Saucer diameter: Broad saucers measuring six to eight inches across provide adequate landing rim space.
- Adhesive types: Waterproof two-part epoxy putty, marine-grade liquid epoxy, or 100% clear exterior silicone.
- Curing duration: Full 72-hour cure time in a warm space to guarantee complete solvent outgassing before outdoor deployment.
Glazed finishes prevent moisture absorption, but they also complicate adhesion. Scuff both contact points thoroughly with 80-grit sandpaper to give the adhesive a mechanical profile to grip.
Pre-1980s vintage china—particularly antique pieces featuring vibrant bright yellows, deep oranges, and rich reds—frequently utilized toxic lead-based glazes and decorative paints. When exposed to outdoor weathering and acidic bird droppings, these heavy metals can leach onto the seeds and poison foraging songbirds. If you are using heavily decorated heirloom pieces, spend $5 on a rapid lead-test swab kit to verify the dish is completely non-toxic before deploying your feeder.
Drilling Drainage Holes Without Cracking the China
You can safely drill drainage holes through delicate porcelain by using a diamond-tipped hole saw submerged in cool water running at low rotational speeds. This continuous lubrication prevents thermal shock, lubricates the cutting edge, and stops the dish from shattering under friction.
Trapped water is the primary cause of seed spoilage in porcelain feeders. When moisture lingers in the bottom of a glazed cup, seed quickly ferments and breeds Aspergillus flavus, a common mold that produces deadly aflatoxins in avian feeding areas.
Experienced forum builders on wild bird networks emphasize that a saucer without drainage acts as a birdbath for seeds, transforming dry grain into a sour, unusable paste after a single light shower.
Drilling hardened ceramic requires patience and the correct technique. Never use high hammer-drill settings or high-speed steel twist bits, as they will instantly fracture the piece.
- Submerge the porcelain base in one inch of standing water inside a shallow plastic wash tub.
- Place a ring of plumbers putty around the drill target to create a localized water reservoir if full submersion is not possible.
- Run a variable-speed cordless drill between 400 and 600 RPM without applying downward force.
- Start drilling at a 45-degree angle to create an initial groove, then slowly tilt the bit perpendicular once the diamond coating bites.
- Drill at least three 1/4-inch holes through the saucer basin and one central hole through the teacup bottom.
Allow the core drill bit to grind through the vitrified layer gradually. Rushing the process creates micro-fractures that will spider across the glaze when winter moisture freezes inside the crevices.
Assembling and Hanging the Feeder Securely
Assemble the feeder by centering the teacup onto the saucer with epoxy or running a threaded stainless steel rod directly through matching central holes. Suspend the finished unit using weather-resistant chain mounted at least five feet off the ground.
The classic upright style places the cup base directly in the middle of the saucer, leaving the outer rim free for seed distribution. An alternative sideways orientation positions the cup on its side with the opening facing outward, acting as a small hopper that shields a portion of the grain from rainfall.
If you choose the sideways mount, secure the contact point with a heavy bead of marine epoxy and clamp it undisturbed for two full days. For maximum structural longevity, avoid relying solely on glued hangers attached to fragile teacup handles.
A mechanical center-rod system running through drilled holes in both the cup and saucer eliminates adhesive strain entirely.
- Hardware core: One 1/4-inch stainless steel threaded rod cut to ten inches in length.
- Cushioning: Neoprene or soft rubber washers placed on both sides of each ceramic contact point to prevent point-loading.
- Attachment rings: Top-mounted stainless steel female eye nuts to accept suspension hooks.
- Fasteners: Locking nuts secured beneath the saucer to hold the entire assembly rigid without over-tightening.
Hang the feeder in a sheltered spot away from high-wind corridors. When positioning your new feeder near the house, adhere to the Audubon Society collision guideline by placing it either within 3 feet of your window glass or beyond 30 feet to prevent fatal bird strikes.
Picking the Best Seed and Adding Perch Grip
Attract native songbirds by filling the cup with black oil sunflower seeds and wrapping natural jute twine around the glazed handle to give tiny bird feet a secure grip. Slick porcelain surfaces cause birds to slip, making textured perches essential for stable landing.
On backyard birding forums, experienced users frequently observe that chickadees, titmice, and nuthatches hesitate to visit smooth porcelain rims because their claws cannot find purchase. You can quickly fix this design flaw by wrapping the ceramic rim or cup handle with untreated natural jute cord secured by a light brush of non-toxic silicone. The rough, fibrous texture provides an ideal mechanical grip for perching birds.
Seed selection also plays a significant role in keeping small teacup feeders neat and sanitary. Generic grocery store mixes containing red milo, cracked corn, and wheat will be discarded by clinging songbirds, rapidly littering the ground below.
- Black oil sunflower: High in lipids and protein, easily handled by chickadees, finches, and nuthatches.
- Safflower seed: Thick-shelled, bitter seed favored by cardinals and chickadees while naturally deterring squirrels and grackles.
- Nyjer seed: Thin, oil-rich seed preferred by American goldfinches when dispensed from narrow sideways cup orientations.
- Hulled sunflower chips: Completely edible seed meat that leaves zero shell debris to rot inside the saucer basin.
Replenish the feed in small, measured quantities every two to three days. Because teacups offer limited holding capacity, fresh seed prevents dampness and keeps local avian flocks returning on a predictable schedule.
Cleaning and Winter Care to Protect Wild Birds
Sanitize your teacup bird feeder every two weeks by soaking the porcelain in a nine-to-one water and bleach solution to eradicate harmful pathogens. This routine prevents outbreaks of dangerous avian diseases like salmonellosis and protects visiting finches and chickadees from cross-contamination.
The non-porous nature of glazed vintage china makes it easier to disinfect than traditional weathered wood, which can harbor bacterial biofilms in deep grain fissures. Never clean cold ceramic pieces with boiling water, as extreme thermal shock can instantly snap the vintage glaze and crack the body. Always use lukewarm wash water followed by a complete air-dry cycle.
Winter presents unique challenges for hanging ceramic fixtures. If standing water freezes inside an undrained teacup bowl, the expanding ice will exert outward hydraulic pressure and split the china in half.
- Scrape out leftover, damp seed sediment using a stiff nylon bottle brush.
- Submerge the disassembled pieces for ten minutes in a standard 1:9 household bleach-to-water dilution bath.
- Rinse the feeder thoroughly with clear water until all traces of chlorine odor dissipate entirely.
- Allow the entire assembly to dry fully in sunlight before refilling it with fresh, dry seed.
Inspect the structural joints regularly throughout the season for signs of glue fatigue or loosening mechanical hardware. Taking these proactive maintenance steps ensures your vintage creation remains a safe, attractive dining sanctuary for backyard birds year after year.