
Winter hits, and suddenly your backyard bird bath turns into a useless ice sculpture. You peek out the window expecting to see birds getting a drink, but instead you’re greeted by a solid block of frozen disappointment. If you’ve been searching for how to make a homemade bird bath heater, you’re definitely not alone. Birds need water just as much in winter as they do in summer, maybe even more, and finding liquid water when everything’s frozen is a real challenge.
Store-bought heated bird baths can run $50 to $150+, which isn’t great, but the good news is you can keep water open for a fraction of the price with a few DIY setups. Most use simple materials you already have or can grab for under twenty bucks, and I’ll walk you through five methods I’ve actually tested (including one that failed pretty badly the first time). We’ll go through everything from the cheap terra-cotta pot trick to the more reliable aquarium heater option. No special skills needed 🙂.
- DIY heaters keep winter bird baths above freezing without turning them into a hot tub.
- Use safe, low-wattage heat sources — no chemicals, salt, or antifreeze ever.
- GFCI outlets and outdoor-rated cords are a must for anything electric.
- Terra cotta pot heaters work well for cheap and look pretty cool.
- Solar setups help on sunny days but won’t cut it during long freezes.
- Aquarium heaters are the most reliable DIY option for harsh winters.
- Christmas lights can work if they’re incandescent and kept dry.
- Heating cables can create long-lasting, stable heated bases.
- Shallow water (1–2 inches) heats faster and stays safer for birds.
- Weekly cleaning and water checks keep everything safe and functional.
What a Bird Bath Heater Actually Does (Spoiler: It’s Not a Hot Tub)
Show Transcript
0:00
Winter hits. You look outside and your bird bath is a solid block of ice. Let’s fix that. Today we’re going over how to turn that frozen mess into a life-saving water source for your local birds using smart, safe, and cheap DIY methods.
0:18
You know the look. Your bird bath has turned into a sad little ice rink. For us, it’s just winter scenery. For the birds that rely on it, it’s a vanished resource. And that’s the point here. This isn’t a cute extra. Liquid water in freezing weather can be the difference between a bird making it through winter or not. A backyard water source is a real lifeline.
0:51
So why does it matter so much? Birds need water for two things. First, to drink and stay hydrated. Second, to bathe. Clean feathers help them stay insulated against the cold. Liquid water literally helps them stay warm.
1:09
Quick note: we’re not making a bird hot tub. The goal is to keep the water around 40–50°F (4–10°C). Just warm enough to stay liquid, totally safe for birds, and energy efficient.
Safety Rules (Don’t Skip These)
1:31
Before we get into building anything, we need to cover the essentials when mixing electricity and water. These four rules are non-negotiable.
1:46
- Plug everything into a GFCI outlet. This cuts power instantly if something goes wrong.
- Only use outdoor-rated extension cords.
- Keep the water shallow — about 1–2 inches.
- Never add antifreeze or any chemicals. Ever.
2:19
Safety handled. Now the fun starts. We’re looking at five ways to heat your bird bath — from simple to more advanced — so you can choose what fits your weather and your comfort level.
Method 1: Terracotta Pot Heater
2:35
This one’s a favorite for a reason. Put a low-wattage bulb, like 40 watts, under an upside-down terracotta pot. Set your bird bath on top. The pot traps the gentle heat and transfers it into the water.
2:55
Pros: cheap, simple, easy to run.
Downside: struggles in very cold weather.
Tip: keep the hole in the pot open so it doesn’t overheat.
Method 2: Solar Heating
3:14
This uses the sun. Paint a bowl black or add dark rocks. They absorb heat and warm the water naturally.
3:27
It’s free energy, which is great. But it won’t hold up at night or on long freezing days. Works best in sunny climates or as a helper alongside another method.
Method 3: Submersible Aquarium Heater
3:47
If you want something dependable and low-effort, this is the one. These heaters come with a thermostat that turns them on only when the water gets too cold.
4:06
Perfect for harsh winters.
Important: your bath must be deep enough to keep the heater fully underwater at all times.
Method 4: Christmas Light Heater
4:16
Feeling festive? This old-school trick uses traditional incandescent Christmas lights. Not LEDs — they don’t generate heat.
4:31
Wrap the lights around the outside of the bath, then wrap that with aluminum foil to reflect the heat inward.
4:46
It’s cheap and works for moderate cold. Just remember the bulbs burn out, so keep extras.
Method 5: Heated Platform (Heavy-Duty)
4:53
If you live somewhere brutally cold, this is the big one. Build a small insulated wooden platform and install an outdoor heating cable inside. Your bird bath sits on top.
5:10
It’s durable, gives even heat, and can be paired with a thermostat.
Downside: takes more time and effort to build.
But it’s the best long-term choice for extreme winters.
Maintenance (Super Easy)
5:26
Your heater is running and the water is liquid. Nice. But there’s a little upkeep to keep everything safe and working well.
5:42
- Top off the water daily — heated water evaporates.
- Give the bath a quick scrub weekly.
- Check cords and the heater every so often for damage.
The Payoff
6:04
After all that building and upkeep, what do you get out of it? A real impact. You’re giving birds a reliable place to drink and stay clean in the hardest part of the year.
6:19
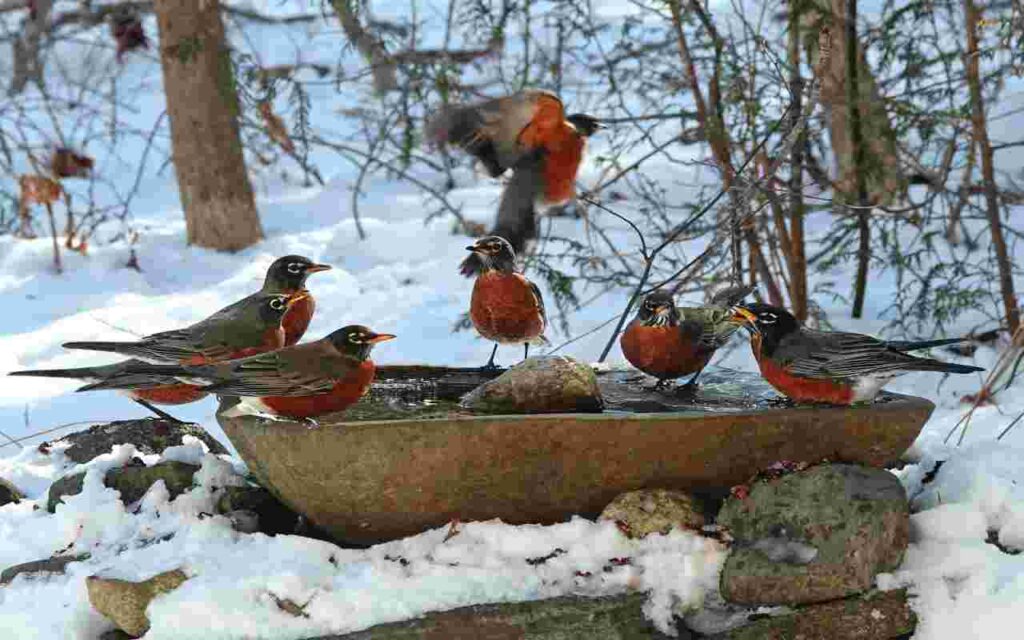
On a snowy day, instead of an empty yard, you’ll see life — cardinals, chickadees, finches — all dropping in because of the haven you created.
6:38
So the only question now is: which method are you going with? Whether you pick the simple terracotta setup or the full heated platform, you’re giving your backyard birds a real boost this winter.
Let’s clear something up right away: you’re not trying to create a toasty spa experience for cardinals. The goal is stupidly simple, keep the water temperature above 32°F so it doesn’t freeze solid. That’s it.
A proper bird bath heater uses gentle, consistent warmth to maintain liquid water. We’re talking maybe 40-50°F max, which feels cold to you but is perfectly comfortable for birds. Birds need water for both drinking and bathing, even in winter they use water to clean their feathers and maintain the essential oils that keep them insulated from the cold.
The beauty of DIY heaters is that most use low-wattage options, think 50-100 watts max, which means they’re safer for birds and won’t murder your electric bill. Commercial de-icers work on the same principle, just with fancier thermostatic controls that automatically kick on when temps drop.
Safety first, folks. Never use chemicals, salt, or antifreeze to prevent freezing. Birds drink this water, and even small amounts of these substances can seriously harm them. Stick with gentle heat sources designed for outdoor use, and you’ll be golden.
Before You Start: The Boring-But-Important Stuff
Alright, let’s talk safety because nobody wants to accidentally electrocute a chickadee or burn down their shed (both of which are, you know, bad).
Rule number one: Any electrical setup needs a GFCI (Ground Fault Circuit Interrupter) outlet. This little gadget cuts power instantly if there’s a short circuit. According to Safe Electricity’s guide on GFCIs, these safety devices shut off electrical power when they detect ground faults, keeping your family safe from electrical hazards by helping prevent electrocution and electric shocks. They cost like $15 at any hardware store, just get one.
Rule number two: Use outdoor-rated extension cords specifically designed for cold weather. Indoor cords get brittle in freezing temps and can crack, exposing wires. Look for cords labeled “outdoor” or with a “W” rating.
Rule number three: Keep water depth shallow, about 1-2 inches max. Birds need to wade in safely, and deeper water is harder to keep ice-free anyway. Plus, if your heater malfunctions, shallow water minimizes any risk.
Now, which bird bath works best? Honestly, most work fine, but here’s the breakdown: ceramic and concrete bird baths retain heat nicely but can crack if water freezes and expands inside tiny fissures. Metal bird baths conduct heat well (good for heating efficiency) but can also conduct cold (not ideal). Plastic baths are crack-resistant but don’t hold heat as long.
IMO, a glazed ceramic or concrete bath on a sturdy base gives you the best results, especially with the terra cotta pot method we’re about to explore.
Check out our guide on how to keep bird baths from freezing in winter for more winter bird bath strategies.
Method 1: DIY Terra Cotta Pot Bird Bath Heater (The Fan Favorite)
This method is everywhere on the internet for a reason, it actually works, it’s cheap, and it looks kind of charming in a rustic-Pinterest way.
What You’ll Need
- One terra cotta pot (6-8 inches diameter works great)
- Low-wattage outdoor bulb (40-60 watts incandescent or halogen, LED won’t generate enough heat)
- Metal tray or ceramic plate
- Heat-safe stand, bricks, or pavers
- Outdoor-rated lamp socket with cord
- GFCI outlet
How to Build It
Position your bird bath where you want it, then create a stable platform underneath using bricks or pavers. You need enough clearance, about 6-8 inches, for your pot heater to sit beneath the bath without touching it.
Screw your outdoor bulb into the lamp socket, then place it upside-down on your metal tray. The tray catches any falling debris and provides a stable base. Now flip your terra cotta pot upside-down over the bulb, making sure the drainage hole at the top stays open, this is crucial for ventilation and preventing the pot from cracking.
Position this whole setup directly under your bird bath bowl. The pot radiates heat upward, warming the bottom of the bath just enough to prevent freezing. Plug everything into your GFCI outlet, and boom, you’ve got radiant heat.
Troubleshooting Common Issues
Pot cracking? This usually means your bulb wattage is too high or you’re blocking the ventilation hole. Drop to a 40-watt bulb and make sure air can escape through the top. Terra cotta is porous and handles temperature changes well, but it’s not invincible.
Uneven heating? Make sure the pot is centered directly under the bath. Heat rises straight up, so positioning matters. If one side keeps freezing, you might need a slightly larger pot or higher wattage (but not over 60 watts).
Bulb burning out constantly? Outdoor bulbs hate moisture. Make sure your socket has a weatherproof cover and isn’t getting splashed when birds bathe. Also, vibrations from wind can shorten bulb life, secure everything firmly.
This setup typically costs $15-25 total and uses about 40-60 watts continuously. At average electricity rates, running a 50-watt bulb 24/7 costs roughly $5-7 per month during winter, way cheaper than buying a commercial heated bath.
For more creative backyard bird projects, check out our article on DIY bird feeders from recycled materials.
Method 2: DIY Solar Bird Bath Heater (Free Heat, Weather Permitting)
Full disclosure: this method is the least reliable, but when it works, it’s pretty slick. You’re basically harnessing passive solar energy, no electricity required.
What You’ll Need
- Black-painted shallow bowl or metal insert
- Clear glass dome or heavy plastic cover (optional but helpful)
- Rocks or pebbles for thermal mass
- Full winter sun exposure
The Setup
Paint the inside of a shallow bowl matte black. Black absorbs maximum solar radiation and converts it to heat. Place this bowl inside or on top of your existing bird bath. Add some dark rocks at the bottom, they absorb heat during the day and release it slowly at night, acting as thermal batteries.
If you want to get fancy, position a clear dome or piece of glass over the bath (with gaps for birds to access water). This creates a mini greenhouse effect, trapping warm air while still allowing birds in. Position everything in the sunniest spot possible, south-facing with no shade between 10am and 3pm.
Reality Check
Here’s the deal: this works great on sunny days above 25°F or so. But during extended cold snaps, cloudy weeks, or at night? The water will freeze. Solar panels on cloudy days can experience efficiency drops of 50-80% compared to sunny conditions, and provide zero warmth after sunset.
This method is better suited for mild winter climates or as a supplement to another heating method. In places like Montreal where I’m at? Yeah, you’ll need backup heat most days.
Pro tip: Combine this with the terra cotta pot method. Use solar heating during the day, and let the bulb take over at night and during cloudy stretches. Best of both worlds.
Method 3: DIY Submersible Aquarium Heater Setup (The Actually Reliable One)
Okay, this is hands-down the most dependable method. It’s what I personally use, and I haven’t dealt with frozen bird bath water in three winters. Sure, it costs a bit more upfront, but it just works.
What You’ll Need
- Low-wattage submersible aquarium heater (50-75 watts)
- GFCI outlet
- Outdoor waterproof electrical box
- Cable management clips
- Deep enough bird bath (minimum 3-4 inches water depth)
Installation Steps
First, choose an aquarium heater rated for outdoor use or one you can protect from the elements. Adjustable models let you set the exact temperature, usually you want around 40-45°F to prevent freezing without overheating.
Submerge the heater in your bird bath according to the manufacturer’s instructions. Most need to be fully underwater to function safely. Run the power cord along the ground or secure it to your bird bath stand using weather-resistant clips, you don’t want the cord dangling where birds might perch on it.
The cord needs to reach your GFCI outlet, which should be protected in a weatherproof electrical box. These boxes cost around $10-15 and keep your connections dry even during snow and rain.
Why This Method Wins
Aquarium heaters come with built-in thermostatic controls. They automatically turn on when water temperature drops below your setting and shut off when it warms up. This saves energy and prevents overheating. As explained in Power Efficiency’s guide to energy-efficient aquarium heaters, advanced thermostat controls ensure the heater only runs when needed, reducing unnecessary power consumption, aquarium heaters with thermostats cycle on and off to maintain temperature rather than running continuously at full power.
The heater sits at the bottom of the bath, so birds can’t accidentally touch it. Most quality models are UL-listed and designed to safely handle being submerged 24/7. You can find decent 50-watt submersible heaters for $15-30 on Amazon or at pet stores.
Common issue: Ice forming at the edges despite the heater running? Your wattage is probably too low for your climate. Bump up to a 75-watt or even 100-watt heater. Or, add insulation around the bird bath base, wrap it with foam pipe insulation or pack straw around the bowl.
Want to keep your regular feeders working well too? Read our guide on how to prevent mold in bird feeders.
Method 4: DIY Christmas Light Bird Bath Heater (Surprisingly Effective)
This old-school trick has been keeping farm water troughs ice-free for decades. It’s not elegant, but it works, especially if you’ve got leftover holiday lights sitting in a box.
Materials List
- Outdoor-rated incandescent Christmas lights (LED lights don’t produce enough heat)
- Aluminum foil or reflective insulation
- Zip ties or outdoor-rated tape
- GFCI outlet
How to Set It Up
Wrap a strand of incandescent Christmas lights around the outside of your bird bath bowl. Space the bulbs evenly for consistent heating. If your bath sits on a pedestal, you can also wrap lights around the stem.
Cover the lights with aluminum foil or reflective insulation, shiny side facing the bowl. This directs heat toward the water instead of radiating it into the air. Secure everything with zip ties or waterproof tape, duct tape fails miserably in cold weather, FYI.
Plug into your GFCI outlet and you’re done. The lights generate gentle, distributed heat that prevents freezing in moderate cold.
Watch Out For These Mistakes
Never let bulbs directly contact water. Even outdoor lights aren’t designed for submersion, you’re asking for a short circuit. Keep at least an inch of clearance between lights and water surface.
Also, check your lights regularly. Incandescent bulbs burn out, and if too many fail, you lose heating capacity. Some people use two strands in parallel so if one strand dies, the backup keeps things running.
This method costs maybe $10-15 and draws around 30-50 watts depending on your light strand length. Not bad at all.
Method 5: DIY Heated Platform Using Outdoor Heating Cable
This is the most advanced DIY option, but if you’re handy and want something permanent, it delivers excellent results.
What You’ll Need
- Outdoor pipe heating cable (25-30 feet)
- Plywood circle (cut to match your bird bath base)
- Cement board or insulation board
- Outdoor thermostat plug (optional but recommended)
- Heat-resistant adhesive
- GFCI outlet
Building the Heated Base
Cut your plywood circle about 2 inches larger than your bird bath base diameter. Attach a layer of cement board on top for heat resistance and durability. Now comes the fun part: snake your heating cable across the surface in a spiral pattern, spacing loops about 2-3 inches apart.
Secure the cable using heat-resistant adhesive or cable clips designed for heating applications. Don’t let the cable overlap itself, that creates hot spots. Run the power cord down through the center of the platform and out the back.
Set your bird bath on top of this heated platform. The cable warms the entire base, which conducts heat into the bowl. Plug into a thermostat-controlled outlet set to activate around 35°F, and you’ve got a smart, efficient heating system.
Troubleshooting
Overheating? Your thermostat setting is probably too high, or your cable is too tightly spaced. Aim for gentle, even warmth, you should barely feel heat when you touch the platform. Drop the thermostat setting by 5 degrees and see if that helps.
Platform warping? Regular plywood doesn’t handle moisture well. Switch to marine-grade plywood or add a waterproof sealant. Better yet, use composite decking material instead of wood, it won’t rot or warp.
Heating cables run about $25-40 for a 25-foot length, and the complete platform setup costs around $50-70. But it lasts for years and works in the deepest freezes.
How to Choose Which DIY Bird Bath Heater is Best for You
Let’s break this down by what matters most to you.
Cheapest option? The Christmas light method wins at around $10-15 total, assuming you already own outdoor lights. Runner-up is the terra cotta pot at $15-25.
Easiest installation? Solar is technically simplest (just paint and position), but the aquarium heater is the easiest effective option, literally just drop it in and plug it in.
Most reliable? Aquarium heater, hands down. Followed closely by the heated platform. These work consistently even during brutal cold snaps.
Best for deep freeze climates? If you regularly see temps below 10°F, go with either the aquarium heater (75-100 watts) or the heated platform. The terra cotta pot method struggles below 15°F.
Best off-grid solution? Solar is your only option here, but honestly, it’s not reliable enough for serious winter. Consider just bringing your bird bath indoors on the coldest nights and setting it back out during the day when sun can help.
Energy efficiency matters too. Low-wattage continuous heating typically uses less energy than high-wattage intermittent heating, so a 50-watt aquarium heater running 24/7 often costs less than a 100-watt setup that cycles on and off.
Learn more about winter bird care in our article on how to attract birds during winter.
| Method | Upfront Cost | Difficulty | Reliability | Best For | Power Use | Pros | Cons |
|---|---|---|---|---|---|---|---|
| Terra Cotta Pot + Bulb | $15–25 | Medium | Moderate | Mild–moderate winters | 40–60W | Cheap, simple parts, natural look | Can crack if blocked, weak in deep cold, bulbs burn out |
| Solar Heater | $10–20 | Easy | Low | Mild climates, sunny areas | None | No electricity, low cost | Fails on cloudy days, freezes overnight |
| Aquarium Heater (Submersible) | $20–40 | Easy | High | Any climate | 50–100W (cycling) | Very consistent, thermostat built-in | Needs deeper bath, cord management required |
| Christmas Lights Heater | $10–15 | Medium | Moderate | Moderate winters | 30–50W | Uses common items, even heat | Must use incandescent, bulbs burn out |
| Heating Cable Platform | $50–70 | Hard | Very High | Harsh winters | 50–80W | Durable, even heat, thermostat-compatible | Most complex, higher upfront cost |
Safety Tips You Actually Need to Follow
Real talk: electricity and water don’t play nice together. Follow these rules religiously, or don’t do this at all.
Use GFCI outlets exclusively. I’ve said it before, I’ll say it again. GFCI outlets detect ground faults in milliseconds and cut power before anyone gets hurt. Regular outlets + water + birds = bad news.
Keep all cords away from where birds perch. Birds might nibble on cords (corvids especially love this), or their droppings can corrode connections over time. Route cords along the ground or under the bird bath stand where they’re out of beak-reach.
Avoid extension cord failures by using cords rated for outdoor winter use. Check them monthly for cracks, exposed wires, or damaged plugs. A cracked cord in freezing weather is a fire hazard waiting to happen.
Prevent bath cracking by never letting water freeze completely. Frozen water expands and can crack even thick ceramic. That’s the whole point of heating it, obviously, but if your heater fails overnight, you might wake up to a cracked bath. Consider bringing delicate baths indoors during extreme cold snaps.
Keep water shallow, 1 to 2 inches maximum. This gives birds safe wading depth and is easier to heat. Deeper water requires more energy and takes longer to warm up.
Also, never use metal bird baths with submersible heaters unless they’re specifically designed for it. Metal conducts electricity, and a faulty heater could potentially electrify the entire bath. Stick with ceramic, concrete, or heavy plastic for submerged heater methods.
Winter Maintenance for DIY Heated Bird Baths
You can’t just set it and forget it. Winter bird baths need regular attention to stay functional and safe.
Refill frequently, birds drink and bathe even when it’s cold, and you’ll also lose water to evaporation from the heater. Check daily and top off as needed. I usually refill every 2-3 days during active use.
Clean weekly at minimum. Bird droppings, algae, and debris accumulate quickly. Empty the bath, scrub it with a brush and hot water (no soap or chemicals), and refill with fresh water. This prevents bacteria buildup and keeps birds healthy.
Check electrical components every few days. Look for frayed cords, moisture in connections, or burnt-out bulbs. Catch problems early before they become safety hazards.
Prevent mineral buildup by occasionally scrubbing with white vinegar and water (50/50 mix). Hard water leaves crusty deposits that reduce heating efficiency and look nasty. Rinse thoroughly after cleaning, no bird wants to drink pickle juice.
A quick maintenance checklist: water level (daily), electrical connections (every 3 days), cleaning (weekly), deep cleaning with vinegar (monthly). Stick to this schedule and your setup will run smoothly all winter.
Cost Breakdown: DIY vs Store-Bought
Let’s talk money because that’s probably why you’re DIYing this in the first place.
Terra cotta pot heater: $15-25 upfront, about $5-7/month to run Solar heater: $10-20 upfront, $0 to run (but limited effectiveness) Aquarium heater: $20-40 upfront, about $6-10/month to run Christmas lights: $10-15 upfront, about $4-6/month to run Heated platform: $50-70 upfront, about $8-12/month to run
Compare this to commercial heated bird baths ranging from $50-150+, which typically use 75-150 watts and cost $8-15/month to operate. The DIY options save you money upfront and often use less energy.
Pros of DIY: Way cheaper initial cost, customizable to your setup, satisfaction of building something yourself, easy to repair or replace components.
Cons of DIY: Requires some handy skills, needs more monitoring and maintenance, might not be as weatherproof as commercial units, no warranty.
When buying makes more sense: If you’re not comfortable with electrical projects, if you need something guaranteed to work in extreme cold, or if you value convenience over cost savings. Sometimes it’s worth paying for peace of mind.
For more bird bath tips, check out our guide on how to attract birds to bird baths.
Common Problems & Quick Fixes
Heater stops working: First, check your GFCI outlet, it might have tripped. Reset it and see if that solves the issue. If not, inspect your bulb or heating element. Test your outlet with another device to rule out power issues. Nine times out of ten, it’s either a tripped GFCI or a burned-out bulb.
Ice forms around the edges: Your heat source isn’t powerful enough or isn’t positioned correctly. Increase wattage by 25-50%, add insulation around the bath exterior, or position your heat source closer to the water surface (while maintaining safety clearances).
Birds ignoring the bath: Make sure the water isn’t too warm, above 60°F and birds might avoid it. Also check placement: birds prefer baths with nearby perches and some overhead cover but clear sightlines for predator watching. According to Cornell Lab of Ornithology’s bird-friendly winter gardens guide, water is essential for all animals and can be scarce in winter, so proper placement helps attract more birds.
Cracked bath: Once ceramic or concrete cracks, you can’t really fix it, water will seep into the crack, freeze, and make it worse. Consider switching to a plastic or metal bath, or use a separate heated bowl insert inside your decorative bath.
Cord problems: If you notice exposed wires, replace the entire cord immediately. Don’t try to tape or patch it, that’s asking for trouble. Cord replacements cost $10-15 and are worth the peace of mind.
FAQ: Your Questions Answered
Can you use a fish tank heater in a bird bath?
Absolutely, that’s method three! Just make sure it’s submersible, rated for your water volume, and plugged into a GFCI outlet. Aquarium heaters are designed for 24/7 water submersion and work perfectly for this application.
How warm should a heated bird bath be?
Aim for 40-50°F maximum. You’re just preventing ice, not creating a hot tub. Birds prefer water temperatures that mimic natural unfrozen water sources they’d find in the wild during winter months.
Is it safe to put a heating pad under a bird bath?
Not really. Most heating pads aren’t designed for outdoor moisture exposure and can short circuit. They also typically generate too much heat and can crack your bath. Stick with methods specifically designed for outdoor use.
Will a solar heater work in freezing temperatures?
On sunny days above 20-25°F, maybe. Below that or on cloudy days? Nope. Solar just doesn’t generate enough heat in winter conditions to reliably prevent freezing. It’s better as a supplement than a primary heating method.
How do you keep cords safe from birds and weather?
Route cords along the ground, bury them slightly if possible, or run them inside protective conduit. Weatherproof all connections with electrical boxes or heat-shrink tubing. Keep cords away from perching spots where birds might investigate them.
How long do DIY heaters last?
Terra cotta pots can last years if you don’t overheat them. Bulbs need replacing seasonally. Aquarium heaters typically last 2-4 years. Heating cables can go 5+ years. Christmas lights burn out fastest, expect to replace annually.
Are homemade heaters expensive to run?
Most DIY options use 30-75 watts, costing $4-10 per month during continuous winter operation. That’s about the same as leaving a porch light on 24/7. Way cheaper than commercial units that often run 100-150 watts.
Final Tips & Your Setup Checklist
Before you start building, run through this checklist to make sure you’re covered.
Heater method chosen? Pick one based on your budget, climate, and comfort level with DIY projects. Start with something simple if this is your first time.
Materials gathered? Double-check you have everything before you start. Nothing’s worse than being halfway through assembly and realizing you need one more trip to the hardware store.
Safety tested? Verify your GFCI outlet works by pressing the test button. Make sure all electrical components are outdoor-rated. If anything looks sketchy, don’t use it.
Bath filled with fresh water? Start with clean water at the right depth (1-2 inches for most setups).
Placement optimized? Position near natural cover, in a spot with good visibility, and convenient for you to maintain. If using solar, prioritize maximum sun exposure.
Maintenance plan ready? Set phone reminders for daily checks, weekly cleaning, and monthly deep maintenance. Consistency keeps everything running smoothly.
One last thing: give your setup a few days to optimize. You might need to adjust positioning, tweak wattage, or modify your approach based on actual performance. Don’t get discouraged if it’s not perfect immediately, even us experienced DIYers tinker with setups.
Conclusion: You’ve Got This
Look, keeping water available for birds in winter isn’t just a nice thing to do, it’s genuinely helpful for their survival. Natural water sources freeze solid, and birds need water for drinking and maintaining their feathers even when temps plummet. According to The Backyard Naturalist’s guide on winter water for wild birds, water is critical for bird survival during cold weather because bathing aids in preening which aligns feathers for optimum insulation and waterproofing.
The good news? You don’t need to drop $100+ on a fancy heated bird bath. Any of these five DIY methods will work if you follow the instructions and maintain them properly. Start with the easiest option that fits your budget, for most people, that’s either the terra cotta pot or the aquarium heater.
As the National Wildlife Federation explains, water is just as important in the cold months as it is during summer, and backyards that provide fresh, clean, liquid water during winter tend to host more avian visitors than do frozen yards. If you want even more winter bird care strategies, definitely check out our comprehensive guide on how to keep bird baths from freezing in winter. It covers additional techniques and troubleshooting tips.
Now get out there and build something. Your backyard birds will seriously appreciate having access to liquid water when everything else is frozen solid. And honestly? There’s something pretty satisfying about watching chickadees and cardinals splash around in water you kept ice-free with your own ingenuity 🙂