
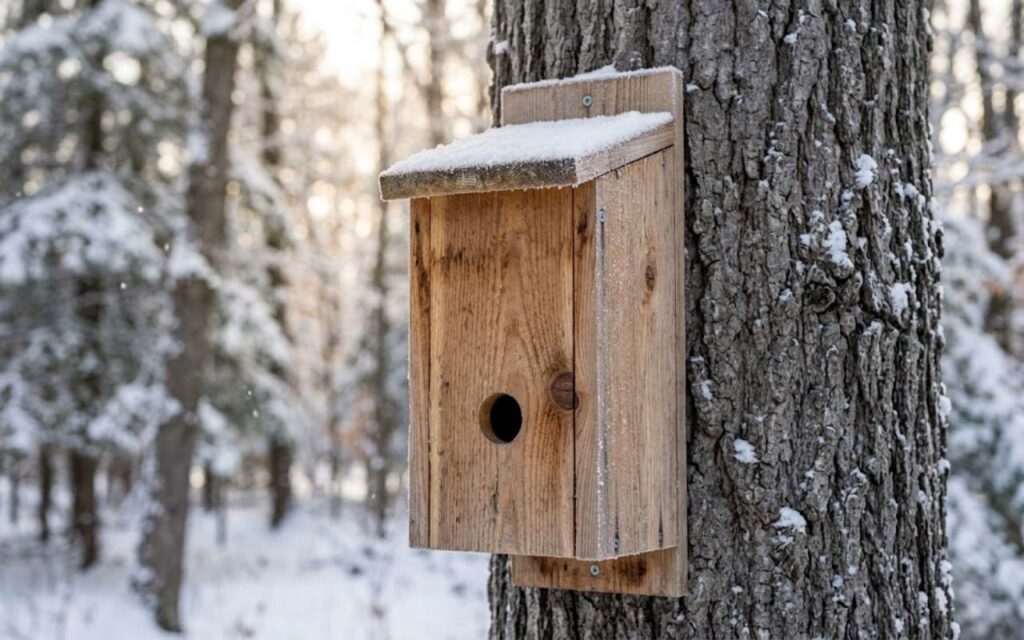
Constructing a cold-weather avian shelter with proper simple winter roost box dimensions ensures that small cavity-dwellers retain critical metabolic heat when nighttime temperatures drop below freezing. Standard summer nest boxes actively dump rising thermal energy through high cross-ventilation slots, creating a dangerous chimney effect in freezing conditions.
A dedicated roosting box solves this issue by placing the entry near the bottom to create an inverted thermal bell that traps escaping warmth. Backyard birders frequently observe downy woodpeckers, bluebirds, and nuthatches packing tightly together inside these shelters to survive sustained sub-zero nights.
Structural Lumber Selection and Core Thermal Volume Parameters
Building an effective roost box begins with selecting lumber that provides substantial thermal resistance against freezing air. Standard dimensional rough-sawn cedar, white pine, or cypress boards with a true minimum thickness of 0.75 inches deliver adequate natural insulation. Avoid pressure-treated wood entirely because chemical preservatives emit hazardous vapors in confined spaces, and avoid thin exterior plywood because freeze-thaw cycles rapidly delaminate the layers.
Interior cavity sizing directly determines whether birds can maintain collective body temperatures during cold snaps. If the interior volume is too expansive, small avian bodies cannot generate enough thermal energy to offset wall heat loss. Conversely, a box that is too cramped increases the risk of suffocation and droppings fouling the plumage of lower birds.
- True wood thickness: 0.75 inches minimum, with 1.0-inch rough cedar representing the ideal thermal standard.
- Interior floor base: 5.5 inches wide by 5.5 inches deep for small songbirds, or 7.25 inches by 7.25 inches for multi-species communal clusters.
- Interior cavity height: 14.0 to 18.0 inches from the interior floor to the highest ceiling point.
- Roof overhang: 2.0 to 3.0 inches over the front panel and 1.0 inch on each side to shed wind-driven sleet.
These proportions create an insulated ceiling zone where rising warm air pools without leaking through corner joints. As birds mass together on interior perches, their combined respiration and metabolic heat warm this pocket. A tight, unvented upper roofline is essential for keeping this warmth stationary.
Inverted Entrance Hole Geometry and Draft Prevention Dynamics
The defining mechanical difference between a nesting box and a roosting box is the entrance location. Nesting boxes locate the entry hole near the roof to protect eggs from ground predators and promote convective airflow. Roost boxes require an inverted layout where the hole sits roughly 1.5 to 2.0 inches above the interior floor.
Placing the hole at the bottom prevents the chimney effect, keeping the warm air pocket undisturbed in the upper two-thirds of the box. Community field tests consistently show that birds reject roost boxes if drafts penetrate the sleeping canopy. The entrance diameter must match the target species to prevent European starlings and house sparrows from usurping the shelter.
- Small songbird hole diameter: 1.25 inches for white-breasted nuthatches, chickadees, and titmice.
- Medium songbird hole diameter: 1.5 inches for Eastern and Western bluebirds.
- Bottom clearance: 1.5 to 2.0 inches measured from the top of the floor to the bottom rim of the hole.
- Entrance protection: A 0.25-inch thick slate or copper metal portal plate installed over the exterior entrance to stop squirrel gnawing.
Never mount an exterior perch beneath the entrance hole. Predators such as raccoons, opossums, and domestic cats use external perches as leverage to reach inside the cavity. Wild cavity-nesting birds enter directly on the wing or cling seamlessly to the raw exterior wood before sliding through the aperture.
Interior Dowel Staggering and Wall Kerf Ladder Execution
Songbirds cannot cling to smooth, mill-planed interior boards during an extended fourteen-hour winter night. Without artificial traction, birds drop to the floor and pile randomly on top of one another, which leads to the suffocation of the lowest individuals. Adding staggered perches and scored wall ladders allows every bird to roost safely without taking on falling droppings from above.
Interior perches should consist of rounded, hardwood dowels measuring 0.375 or 0.5 inches in diameter. These dowels must be staggered diagonally across the interior space rather than stacked directly on top of each other. Staggering ensures that birds resting on the upper tiers do not soil the feathers of birds perched below, which preserves the insulating efficiency of their down feathers.
- Horizontal dowel diameter: 0.375 to 0.5 inches made from non-slippery birch or oak.
- Vertical perch spacing: 3.5 to 4.0 inches between ascending tiers.
- Perch offset distance: At least 2.5 inches of horizontal separation between vertical dowel centers.
- Interior wall scoring: Kerf cuts measuring 0.125 inches deep spaced every 0.5 inches across the entire interior front and back panels.
Wall kerfing is an outstanding community-tested alternative to interior dowel systems. By running a handsaw or table saw blade across the inside faces before assembly, you create a ladder-like texture. Clinging birds like brown creepers and downy woodpeckers prefer gripping these textured grooves directly rather than balancing on round perches.
Step-by-Step Cut List and Tool Assembly Instructions
You can complete this beginner build using a single 1-inch by 8-inch by 8-foot board of untreated pine or western red cedar. Standard retail lumber sold as 1×8 actually measures 0.75 inches thick by 7.25 inches wide, which matches these target dimensions perfectly. Double-check all board measurements before cutting to avoid grain split and waste.
Core Safety Protocols: Before making any cuts, put on ANSI-approved safety glasses to protect your eyes from flying wood fragments and a tight-fitting dust mask to prevent inhalation of airborne cedar or pine particulates. Ensure your workspace is well-ventilated, secure loose clothing or hair away from moving machinery, and keep your hands clear of the blade paths at all times when operating power tools.
Gather basic hand or power tools before starting your fabrication. A miter saw or hand crosscut saw, a drill driver, a spade or Forstner bit matching your chosen entry hole diameter (1.25 inches for small songbirds or 1.5 inches for bluebirds), a tape measure, and exterior-grade hardware are all that you require. Always assemble the unit using rust-resistant exterior deck screws rather than nails, which work loose under seasonal moisture expansion.
- Back mounting board: 7.25 inches wide by 22.0 inches long, leaving 2.0-inch mounting tabs at the top and bottom.
- Front panel: 7.25 inches wide by 15.0 inches long, with the entry hole bored along the bottom centerline.
- Side panels (two cuts): 5.75 inches wide by 16.0 inches long on the back edge, cut at an 8-degree angle down to 15.0 inches on the front edge.
- Sloped roof panel: 7.25 inches wide by 9.0 inches long to establish adequate overhangs.
- Floor panel: 5.75 inches wide by 4.25 inches deep, with 0.25-inch drainage angles cut across all four corners.
Fasten the back panel to the two side walls using 1.625-inch star-drive coated exterior screws, fitting the sides flush against the inner face of the back board. Pre-drill every screw hole with a countersink bit to avoid splitting the dry wood fibers near the edges. Insert the floor panel, recessing it up 0.5 inches from the bottom edges of the side panels to keep water wicking away from the interior seams. Fasten the front panel directly over the front edges of the side panels.
Attach the roof using screws driven directly into the back and side panels, or install a galvanized exterior hinge to simplify spring maintenance. When constructing, install one side panel using a single pivot screw near the top edge and a removable brass locking pin at the base. This swing-out access door allows you to sweep out droppings and debris at the end of the winter season without unmounting the box.
(Note: Don’t forget to also update your final sanitation section as noted in the original audit, making sure readers know to wash away bird droppings before applying bleach to avoid dangerous chemical fumes!)e base. This swing-out access door allows you to sweep out droppings and debris at the end of the winter season without unmounting the box.
Winter Field Mounting Protocols and Moisture Debris Management
Proper habitat placement determines whether small birds will locate and adopt your roost shelter. Mount the finished box between 5 and 10 feet off the ground on an isolated galvanized steel pipe or four-by-four post. Avoid nailing the shelter directly to living trees, as trunks provide free climbing lanes for outdoor cats, mice, and raccoons.
Face the box toward the south or southeast to achieve passive daytime solar warming. This orientation also protects the low entrance hole from prevailing north and northwesterly winter winds. Ensure the flight path toward the entrance hole remains clear of low branches while keeping brushy defensive cover within 15 to 20 feet.
- Steel post mounting: Use U-bolts on 1.0-inch galvanized electrical metallic tubing (EMT) conduit.
- Predator baffling: Install an 8.0-inch diameter, 24-inch long cylindrical steel stovepipe baffle centered 4.5 feet above the ground.
- Winter insulation prep: Place a clean 0.5-inch layer of dry pine shavings or coarse dried wood chips on the bottom floor.
- Floor weep holes: Drill four 0.25-inch drainage holes through the floor corners to prevent frozen standing water.
Communal roosting generates significant internal water vapor from avian respiration. If condensation collects and freezes on the birds, hypothermia quickly follows. The clipped corners and bottom drainage holes draw in cold dry air just quickly enough to exhaust floor moisture while the overhead thermal cap remains undisturbed.
Perform a thorough sanitation sweep each March as birds transition from survival roosting to solitary nesting. Remove used wood chips, scrub the inner walls with a firm brush using a 1:9 household bleach-to-water dilution, and let the box dry completely in the sun. This cleaning destroys dormant fungal spores such as Aspergillus flavus, protecting future occupants throughout the breeding cycle.